Advanced MesoSim Patterns pt. 2

This is part two of the MesoSim Advanced Patterns series, where we explore practical ways to improve your options trading simulations. Learn how to use 25pt strike multiples, track bid-ask spreads, set smarter entry and exit rules, and integrate external data for better results.
Select Strikes using 25-point multiples
It is often assumed that selecting Strikes based on 25-point multiples (e.g., 6000, 6025, 6050, 6075, 6100, etc.) reduces entry and exit costs due to better fills. However, this approach cannot be validated through simulation, and we found no scientific research paper addressing this topic. Sometimes the 25 multiples has higher Open Interest, which might mean better liquidity. Studying this assumption in real market conditions would be a costly exercise. Our intuition tells that the width of the bid-ask spread might serve as a better proxy for the liquidity and slippage of a contracts.
Nevertheless, this question arises from our users from time to time, so we provide a solution here.
To implement 25pt multiples, you can use the Complex StrikeSelector for each leg in your strategy. Add a Constraints section with the following condition:
"StrikeSelector": {
    ...,
    "Complex": {
        "Statement": "abs(leg_short_put_delta)",
        "Target": "9",
        "Constraints": [
            "leg_short_put_strike % 25 == 0"
        ]
    }
}
The % 25 == 0 condition ensures the strike price is a multiple of 25 by using the modulo operator, which checks the remainder of a division. If the remainder is 0, the strike price is evenly divisible by 25.
During adjustments, you can also maintain the 25pt multiples structure. For example, if you move a leg to a new strike, you can ensure that the same constraint applies.
Example run: https://mesosim.io/backtests/d78a6ae7-d8db-4d62-ad2d-4804757667a1
Measuring bid-ask spread for a given leg
Measuring the bid-ask spread in options trading is crucial as it reflects the cost of entering and exiting trades. Narrower spreads indicate lower costs and greater liquidity.
To measure the bid-ask spread width, you can use an UpdateVarsAdjustment that fires once a day. This adjustment dynamically calculates the spread for a specific leg using the formula: leg_LEGNAME_ask - leg_LEGNAME_bid.
Below is an example of how to configure this setup:
{
  "Adjustment": {
    ...,
    "ConditionalAdjustments": {
      "true -- always triggers": {
        "UpdateVarsAdjustment": {
          "VarDefines": {
            "spread_calc": "leg_LEGNAME_ask - leg_LEGNAME_bid"
          }
        }
      }
    },
    "MaxAdjustmentCount": null
  }
}
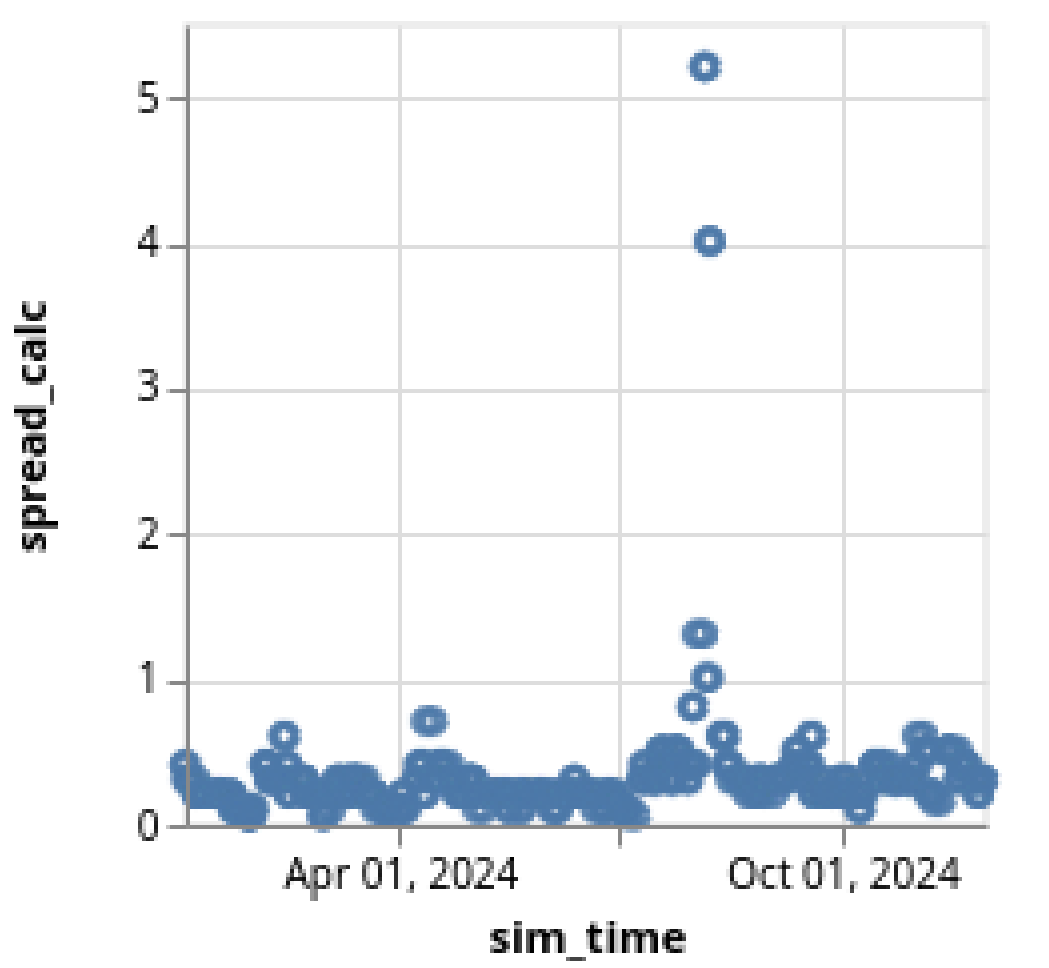
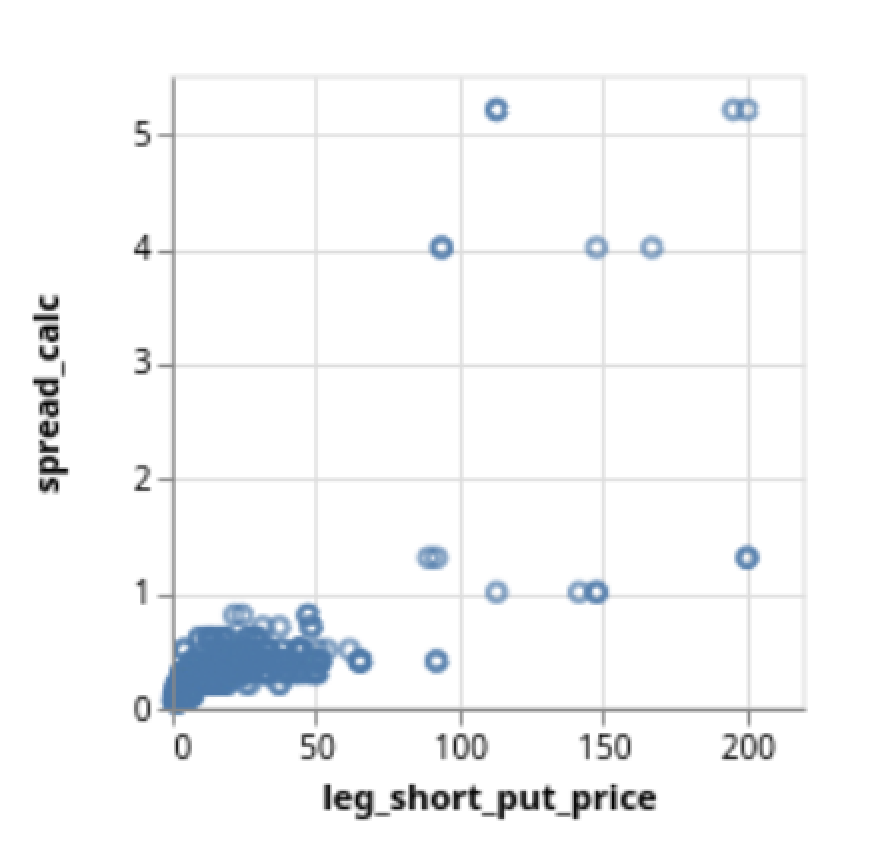
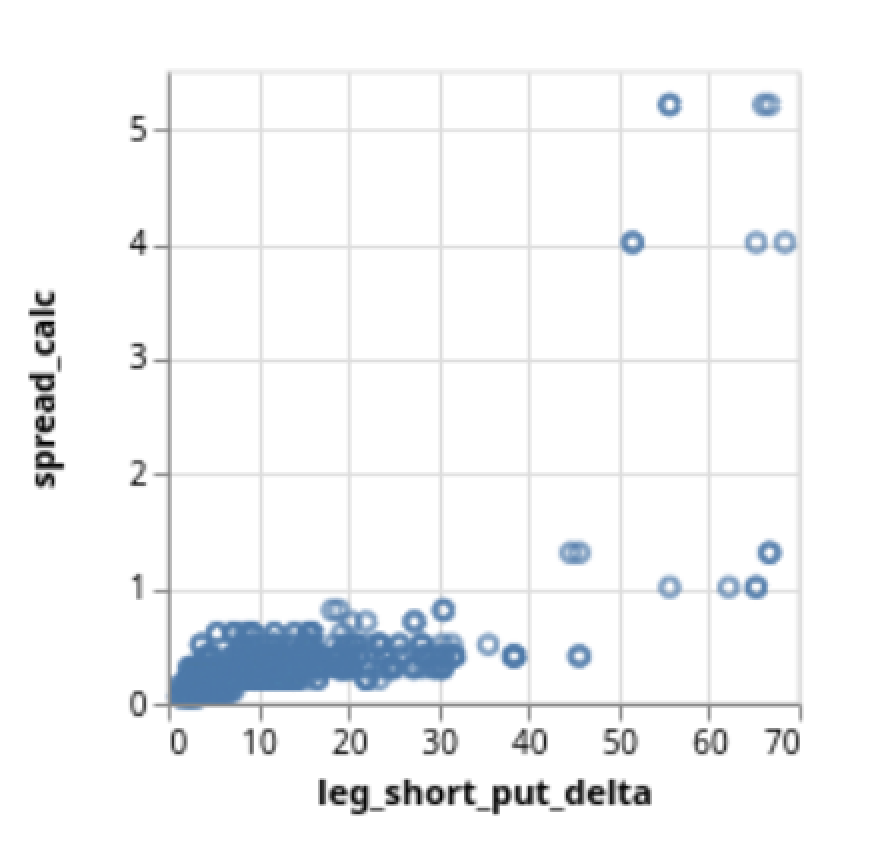
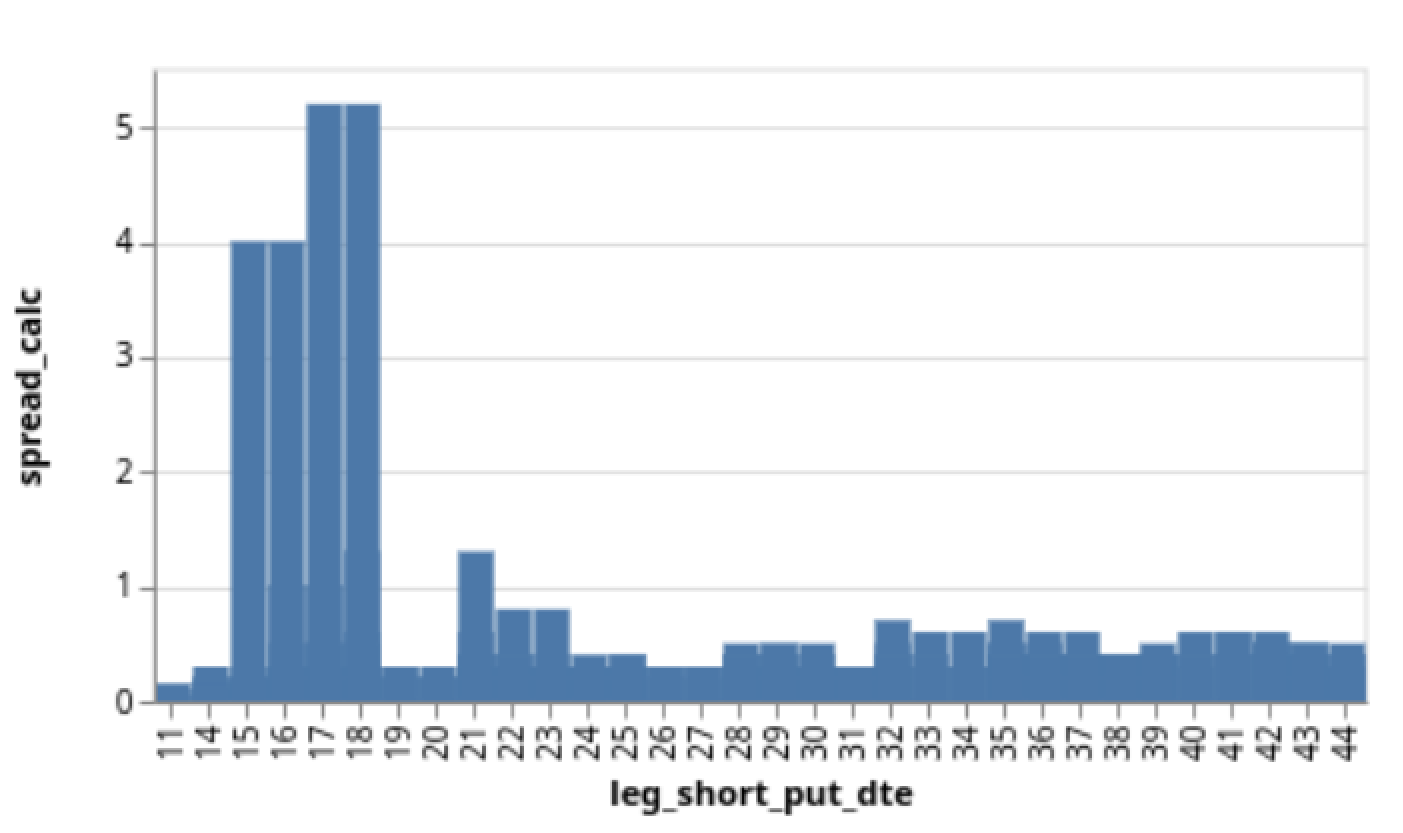
To create these visualizations using Data Voyager, you can plot the spread_calc variable on the Y-axis while selecting different X-axis variables, such as sim_time, leg_short_put_price, leg_short_put_delta or leg_short_put_dte.
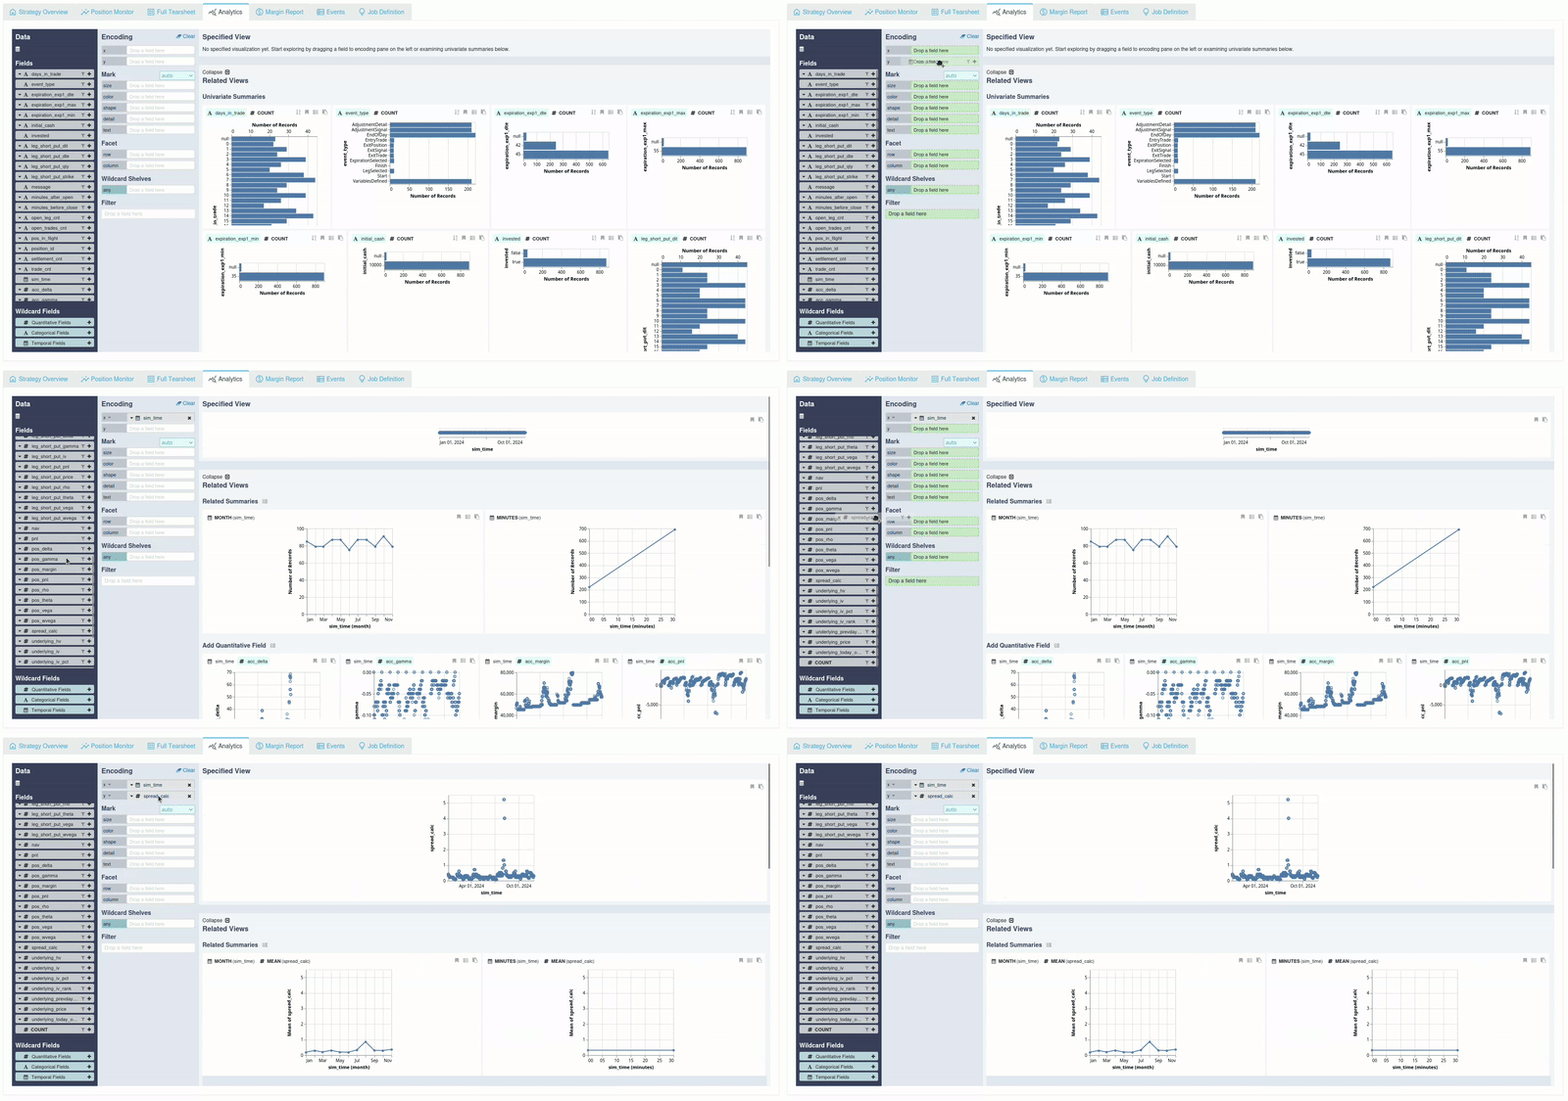
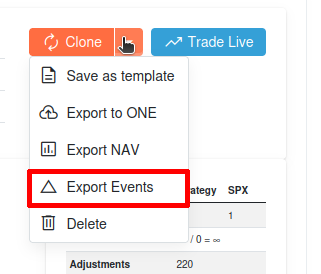
You can also summarize the spread_calc data by processing the event log after the simulation. Use the Export Events button to save the events as json and you can use a converter to create a csv or xls file out of it
Example Run: https://mesosim.io/backtests/92265acb-dfde-4ddd-a6da-659a185ee322
Bid-Ask spread width based entry / exit
The example above shows that the bid-ask spread can change during the trade lifecycle. To safeguard your strategy from poor or illiquid market conditions, you can set rules to block trades from entering or exiting when the bid-ask spread exceeds the normal range.
Entry Abort Conditions
To use the bid-ask spread during Entry in MesoSim, you can define these conditions as AbortConditions under the Entry block:
  "Entry": {
    ...,
    "AbortConditions": [
      "leg_short_call_ask - leg_short_call_bid > 0.5"
    ],
    ...
  },
This logic ensures that the strategy won’t enter a trade when the spread is too wide. To determine the normal spread width please refer to the above section.
Use AbortConditions instead of Entry.Conditions here because they work differently. AbortConditions are checked after the legs are chosen, while Entry.Conditions are checked before any leg is picked. Since leg prices become available after the legs are selected, we must use AbortConditions here.
Exit Conditions
For exits, you can incorporate bid-ask spread validation to ensure positions are exited only when the market is within a normal liquidity range. Referring back to the bid-ask spread measurement, you can use the calculated spread for each leg and define exit conditions as follows:
  "Exit": {
    ...,
    "Conditions": [
      "leg_short_call_ask - leg_short_call_bid <= 0.5 and pos_pnl > 500"
    ],
    ...
  },
This ensures:
- The bid-ask spread for the short call leg is below 0.5.
- The
pos_pnl(position profit or loss) reaching $500
Example Run: https://mesosim.io/backtests/bbe8827e-0500-4c9f-9952-17d284a5972f
Double click on series to isolate
One of the features of the MesoSim Position Monitor is the ability to interact with chart series. Specifically, you can double-click on any series at the top of the graph to isolate it.
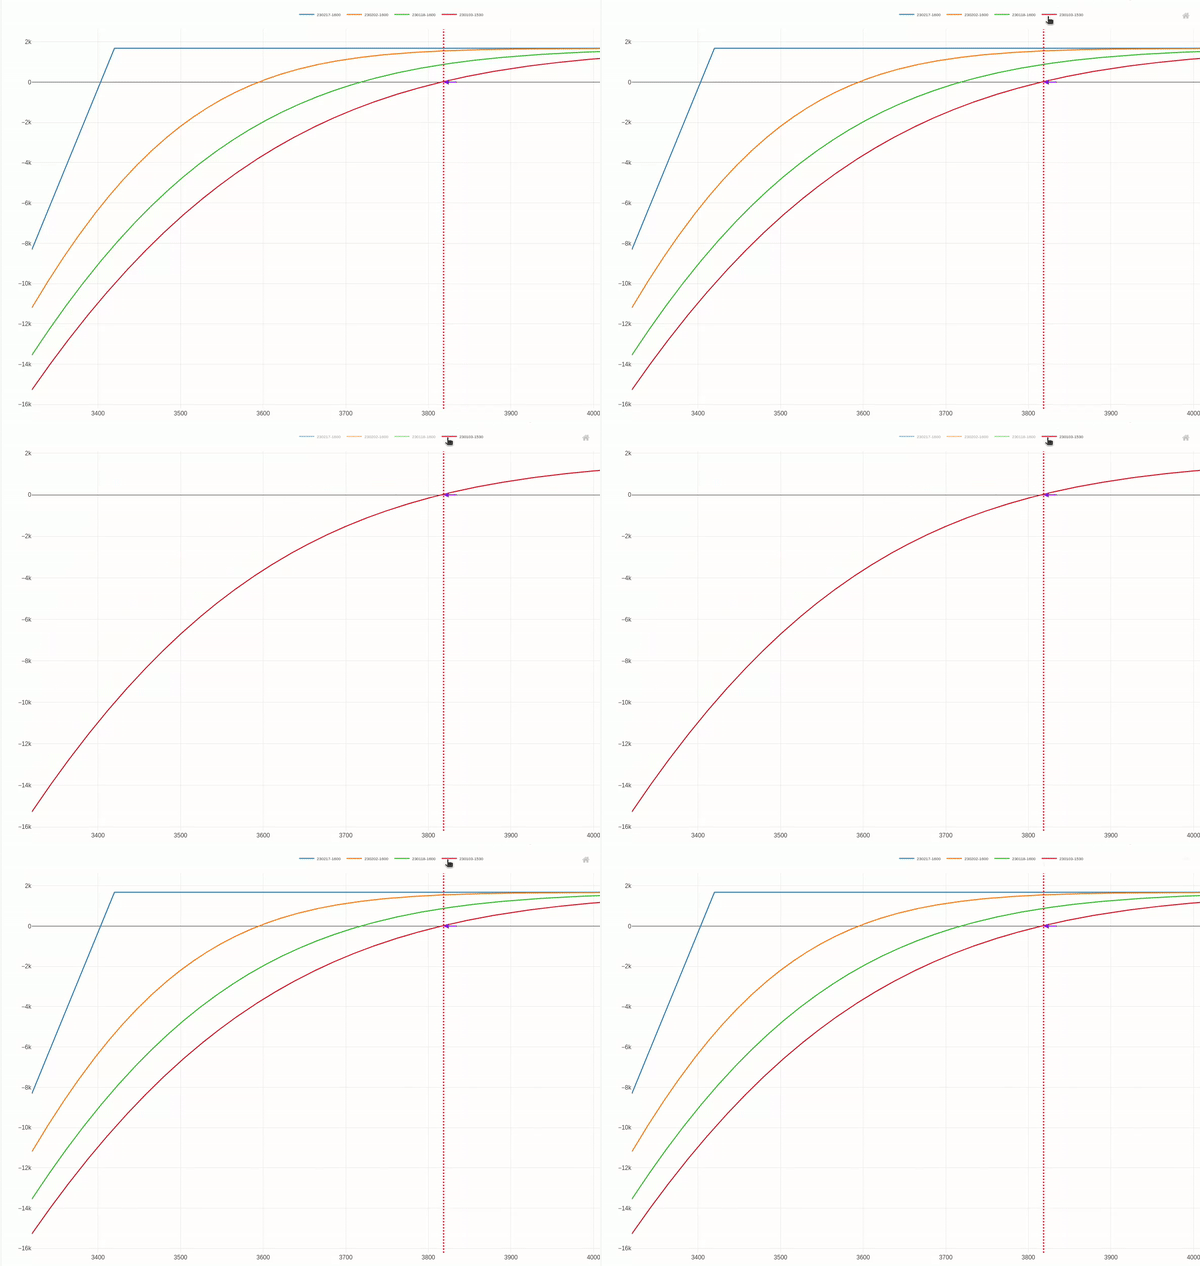
The Backtest Details page includes several panels showing key metrics such as P&L, Greeks, and underlying price movements. At the top of each panel, you’ll find a legend listing all available series (e.g., Delta, Gamma, Vega, VIX, etc.).
- Click to Toggle Visibility: Clicking on any series will toggle its visibility on the graph, allowing you to hide irrelevant data points temporarily.
- Double-Click to Isolate: If you double-click on a specific series, all other series will be deselected, leaving only the one you double-clicked. This makes it incredibly easy to focus on one metric in detail.
Hit SL or PT multiple times before closing a position
When designing an options trading strategy, allowing the Profit Target (PT) and Stop Loss (SL) to be reached multiple times helps prevent premature exits caused by temporary price dislocations. This approach enhances risk management.
Entry
We initialize pt_hit variable to zero. Later we'll increment this variable based on the actual profit levels.
"Entry": {
    ...,
    "VarDefines": {
        "pt_hit": "0"
    }
    ...
}
Conditional Adjustment
-
Increment
pt_hitwhen profit exceeds our threshold ($500):"pos_pnl > 500": {
"UpdateVarsAdjustment": {
"VarDefines": {
"pt_hit": "pt_hit + 1"
}
}
} -
Reset
pt_hitif profit drops below the threshold:"pos_pnl < 500": {
"UpdateVarsAdjustment": {
"VarDefines": {
"pt_hit": "0"
}
}
}
Exit
Exit on repeated profit target hits.
This Exit.Condition ensures that profit is locked in after profit target is reached 3 times.
"Exit": {
  ...,
  "Conditions": [
      "pt_hit > 1 and pos_pnl > 500" ,
  ],
  ...
}
Example Run: https://mesosim.io/backtests/8f17b461-bd6f-45a9-a9a8-667148aee3e9
Delta selection based on external data
Delta-based Strike Selection allows the simulator to choose the strike price of an option contract based on its Delta. By integrating external data, you can dynamically adjust this Delta selection based on market conditions, indicators, or signals provided in a CSV file.
Define the External Data Source
Use the ExternalData.CsvUrl field to specify the URL of your CSV file.
"ExternalData": {
    "CsvUrl": "https://gist.githubusercontent.com/user/RAW_CSV_PATH.csv"
}
Use External Data in Delta Specification
Use the example_signal variable in the Delta field of the StrikeSelector together with the Ternary Lua Operator.
"StrikeSelector": {
    "Min": null,
    "Max": null,
    ...,
    "Delta": "example_signal == -1 and 30 or 25",
    ...
}
Using the above Strike Selector, a 30 Delta is targeted when example_signal == -1; otherwise, the Delta target is set to 25.
Example Run: https://mesosim.io/backtests/46e6719a-1811-41ac-8261-3374056a382b
